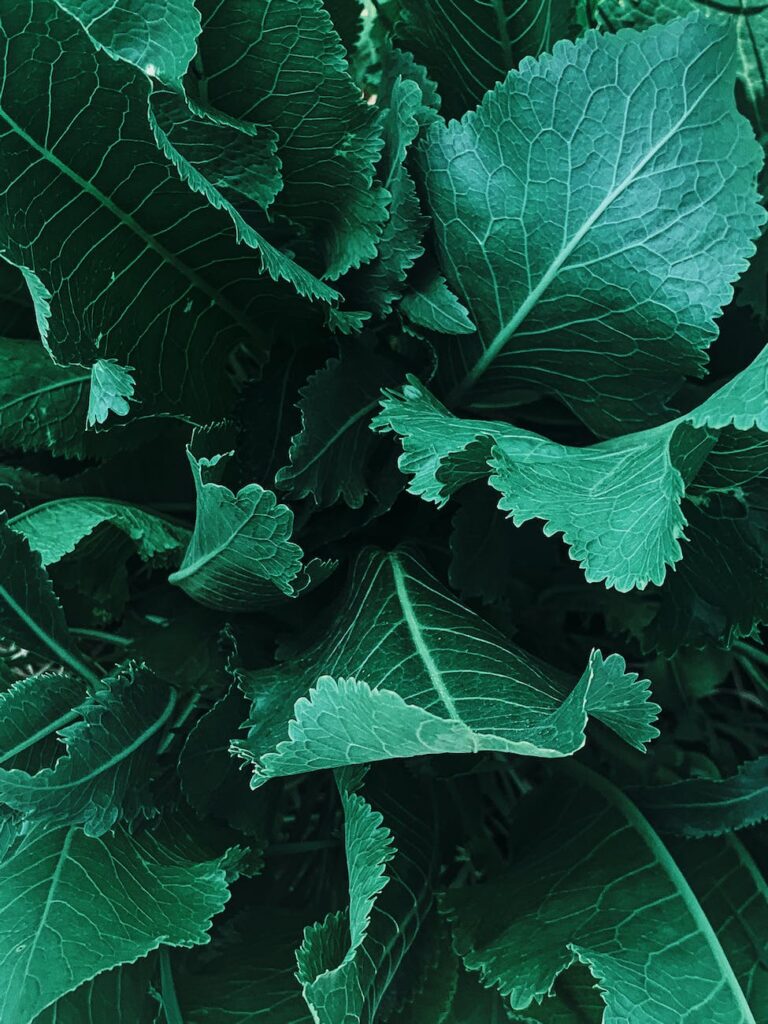
Tackling Yellow Leaves in Vegetable Plants.
If you’ve ever been greeted by the disheartening sight of yellow leaves on your once-vibrant vegetable plants, you’re not alone. As someone who has spent countless hours nurturing a garden, I understand the frustration that comes with seeing your hard work marred by the telltale yellowing that signals distress in your leafy companions.
In this gardening journey, I’ve faced the challenge of yellow leaves more than once. Each time, it’s been a puzzle to unravel, a mystery to solve. But fear not! This guide is here to help you decode the language of yellowing leaves and provide practical solutions to revive your vegetable garden.
Understanding the Causes of Yellow Leaves
Gardening is a bit like detective work – you see a problem, and now it’s time to figure out “whodunit” in the case of the yellow leaves. As any seasoned gardener will tell you, these golden-hued distress signals can be caused by a variety of factors, each with its own set of clues.
Unveiling the Culprits
Overwatering and Underwatering
Picture this: you’re tending to your garden with the best intentions, but too much or too little water can lead to the same outcome – yellow leaves. It’s a bit like Goldilocks finding the perfect porridge; your plants need just the right amount of water. I’ve had my fair share of learning this lesson.
Signs of Overwatering:
- Wilting despite wet soil
- Yellowing leaves with a waterlogged appearance
Signs of Underwatering:
- Dry, crispy leaves
- Wilting despite dry soil
Tip: Stick your finger into the soil – if it feels consistently moist, you might be overwatering. If it’s dry an inch or two down, your plants might be thirsty.
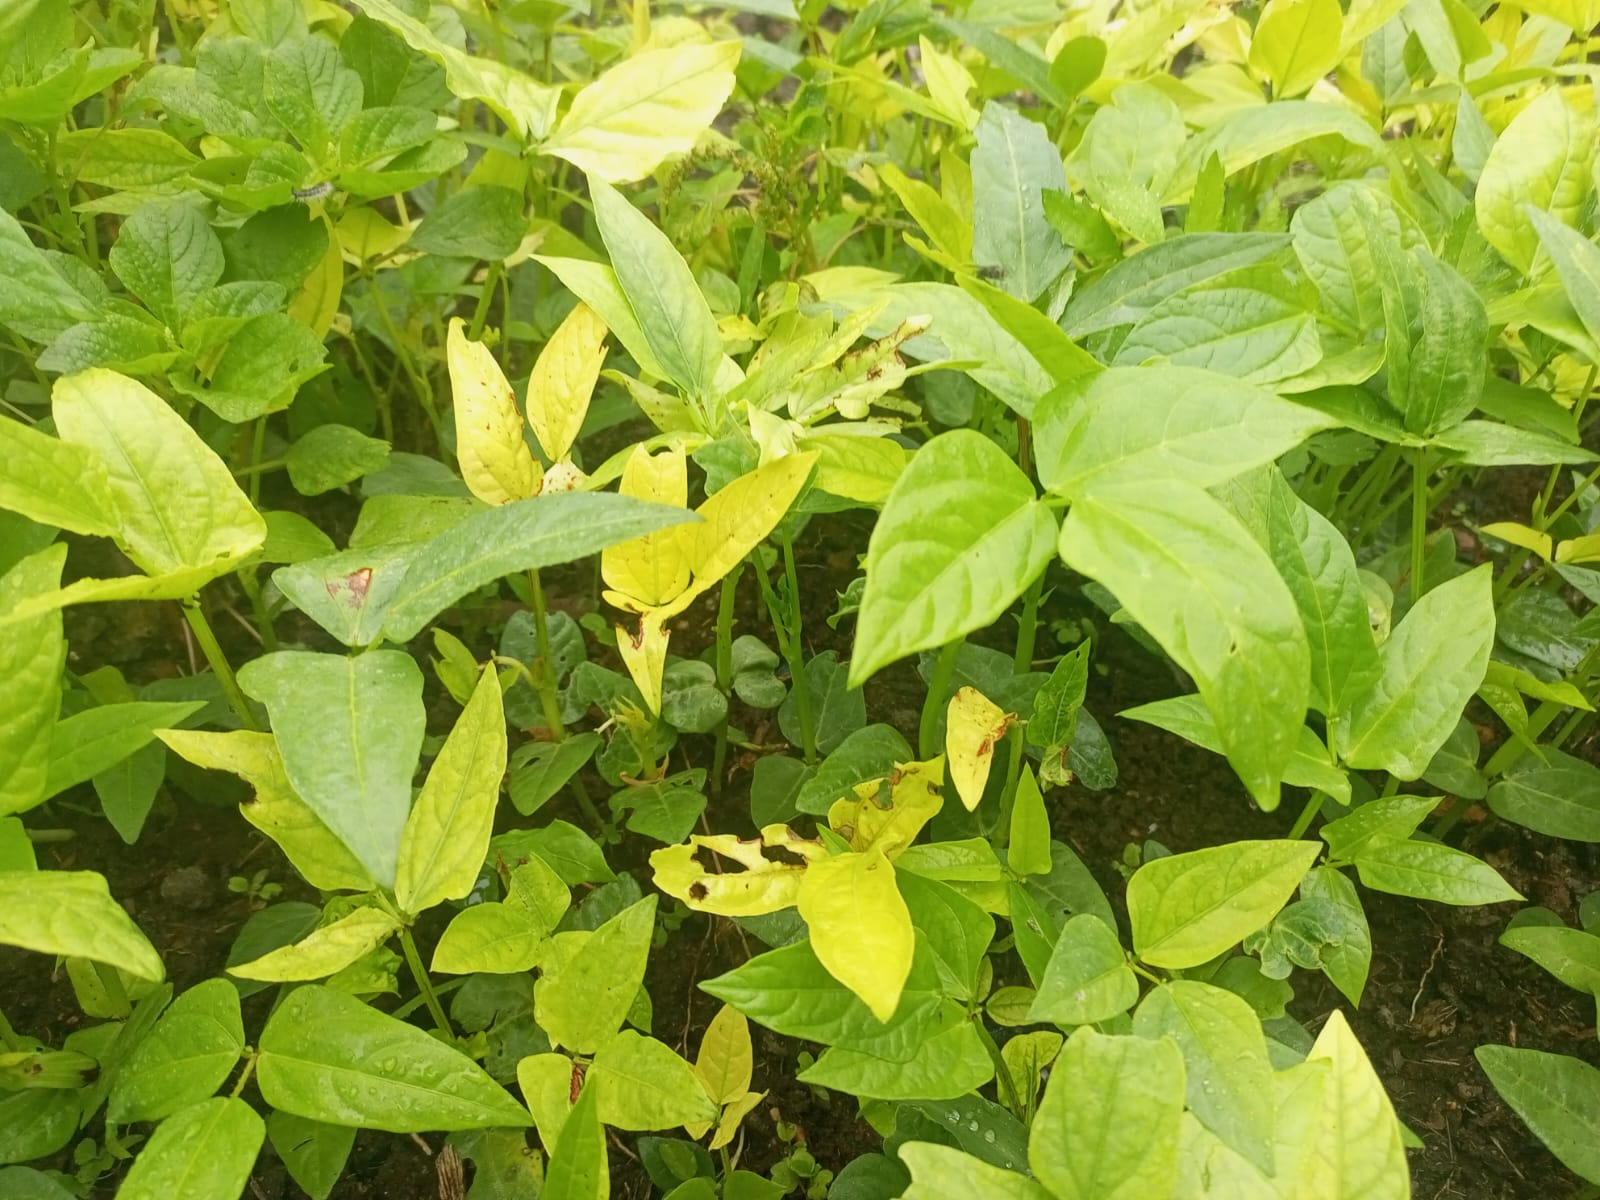
Nutrient Deficiencies
Plants, much like us, need a balanced diet to thrive. When essential nutrients are lacking, your vegetables may start to display yellow leaves, indicating a cry for help. It’s like sending them to the plant spa for a nourishing treatment.
Common Nutrient Deficiencies:
- Nitrogen: Yellowing starts at the bottom leaves.
- Iron: Yellowing between leaf veins.
- Magnesium: Yellowing between leaf veins but in a V-shaped pattern.
Tip: A soil test is your best friend here. It’s like a blood test for your plants, revealing exactly what nutrients are missing.
Pests and Diseases
The world of gardening has its own cast of characters, and not all of them are friendly. Pests and diseases can turn your garden into a battleground, with yellow leaves as the casualties. Think of it as a tiny invasion that requires swift and strategic action.
Common Pests and Diseases:
- Aphids: Tiny, sap-sucking insects.
- Fungal Infections: Manifest as yellow spots or patches.
Tip: Regularly inspect the undersides of leaves and the soil around your plants. Early detection is your secret weapon.
Environmental Stress Factors
Just like us, plants can get stressed out. Extreme temperatures, too much sunlight, and harsh winds are all potential stressors that can result in those dreaded yellow leaves. It’s like a spa day gone wrong for your veggies.
Environmental Stress Factors:
- Extreme Temperatures: Yellowing due to heat or cold stress.
- Sunlight Intensity: Scorching causing yellowing and browning.
- Wind: Physical damage leading to yellow leaves.
Tip: Shield your plants from the elements. It’s like giving them a cozy blanket to weather the storms.
Now that we’ve unmasked the culprits, it’s time to tackle each one head-on. Which of these sneaky villains have infiltrated your garden? Let me know, and we’ll navigate the path to greener pastures together.
Overwatering and Underwatering: Finding the Right Balance
Welcome to the Goldilocks dilemma of gardening! Just like Goldilocks searching for the perfect porridge, your plants crave the ideal amount of water. As I’ve learned firsthand, too much or too little can leave you with yellow leaves, signaling that it’s time to fine-tune your watering routine.
The Goldilocks Dilemma
Signs of Overwatering
When it comes to overwatering, think of it as drowning your plants in kindness. The signs are subtle but crucial to catch early on:
- Wilting Despite Wet Soil: Your plants might appear wilted even though the soil is consistently damp.
- Yellowing Leaves with a Waterlogged Appearance: The leaves take on a yellow hue, and the soil feels excessively moist.
Tip: Stick your finger into the soil. If it feels consistently wet, you might be showering your plants with too much love.
Signs of Underwatering
On the flip side, underwatering is like leaving your plants stranded in a desert. Keep an eye out for these telltale signs:
- Dry, Crispy Leaves: The leaves lose their usual suppleness and become dry to the touch.
- Wilting Despite Dry Soil: Even when the soil is dry, your plants may exhibit signs of wilting.
Tip: Check the soil an inch or two down. If it’s dry, your plants are thirsty and need a sip of water.
Tips for Proper Watering
Now that we’ve identified the extremes, let’s talk about achieving that sweet spot – the Goldilocks zone of watering.
1. Checking Soil Moisture
Make it a habit to regularly check the moisture level of your soil. This simple step can prevent both overwatering and underwatering. Your finger is your best tool – stick it into the soil and feel for moisture.
Example: Last summer, my tomato plants fell victim to my overzealous watering. The leaves turned a subtle shade of yellow, and I realized I needed to adopt a less-is-more approach.
2. Adjusting Watering Frequency
Understanding your plant’s needs is crucial. Different plants have different water requirements, so adjust your watering frequency accordingly. Factors like climate, soil type, and the type of plant play a role in determining how often you should water.
Example: My herbs prefer drier conditions, so I adjusted my watering schedule accordingly. It made a noticeable difference in their overall health.
Remember, finding the right balance is an ongoing process. Your garden is unique, and the key is to pay attention to its individual needs. So, how’s your watering routine? Any challenges or success stories you’d like to share? Let’s chat about it, and together, we’ll make sure your plants get the perfect sip every time.
Nutrient Deficiencies: Nourishing Your Plants
Now that we’ve tackled the Goldilocks dilemma of watering, let’s turn our attention to another vital aspect of plant health – providing them with the right nutrients. Much like humans need a balanced diet, your plants crave essential nutrients to thrive. Let’s explore the world of plant nutrition and ensure those yellow leaves get the nourishment they need.
Feeding the Hunger
Common Nutrient Deficiencies Leading to Yellow Leaves
- Nitrogen Deficiency: Yellowing starts at the bottom leaves and gradually moves up the plant. It’s like the plants are telling you they’re running low on their favorite energy boost.
- Iron Deficiency: Yellowing occurs between the leaf veins, giving the leaves a distinctive pattern. Think of it as the plant’s way of asking for a bit more iron in its diet.
- Magnesium Deficiency: Similar to iron deficiency, yellowing appears between leaf veins, but in a V-shaped pattern. Picture it as the plants signaling a need for more magnesium to keep their metabolic processes in check.
Tip: Understanding these signs is like decoding a nutritional SOS message from your plants. They’re letting you know precisely what they lack.
Soil Testing and Fertilization Tips
To become a plant nutritionist, start with a soil test. It’s like sending your soil to the doctor for a comprehensive check-up. Soil tests reveal the nutrient levels in your soil, allowing you to tailor your fertilizer application to meet your plants’ specific needs.
- Collect Soil Samples: Take samples from different areas of your garden to get a representative mix. It’s like creating a diverse menu for your plants.
- Interpreting Results: Soil test results are your guide to creating a balanced diet plan for your plants. They tell you what your soil lacks and what amendments are needed.
- Choosing Fertilizers: Whether you opt for organic or synthetic fertilizers, the key is balance. Organic options release nutrients slowly, while synthetic ones provide a quicker fix.
Example: My lettuce plants once showed signs of nitrogen deficiency. A quick soil test unveiled the issue, and I introduced compost into the soil. It was like a revitalizing salad for my plants, and the yellow leaves transformed into a lush green.
Organic vs. Synthetic Fertilizers
The great fertilizer debate often boils down to choosing between organic and synthetic options. Each has its merits, and the decision depends on your gardening philosophy and the specific needs of your plants.
- Organic Fertilizers: Derived from natural sources, these fertilizers promote soil health and microbial activity. They’re like a wholesome, home-cooked meal for your plants.
- Synthetic Fertilizers: Engineered for quick nutrient delivery, synthetic fertilizers provide a rapid boost. Think of them as a vitamin shot for your plants.
Tip: A combination of both organic and synthetic fertilizers can offer the best of both worlds, providing a gradual, long-term solution alongside quick nutrient fixes.
Certainly, let’s jump into the section on identifying and eliminating pests and diseases in your garden:
Pests and Diseases: Identifying and Eliminating Threats
Imagine your garden as a peaceful kingdom, and pests and diseases as the sneaky invaders plotting to disrupt the tranquility. Dealing with these uninvited guests is a crucial aspect of maintaining a healthy garden. Let’s put on our detective hats and explore the world of pests and diseases to ensure those yellow leaves are not a result of a garden coup.
The Silent Invaders
Recognizing Common Pests and Diseases Causing Yellowing
- Aphids: These tiny, sap-sucking insects can quickly turn your garden into their feeding ground. Yellowing leaves, sticky honeydew, and distorted growth are signs of an aphid invasion.
- Fungal Infections: Yellow spots or patches on leaves, often accompanied by a powdery or slimy substance, are indicators of fungal infections. It’s like your plants catching a cold.
Tip: Regularly inspect the undersides of leaves and the soil around your plants. Early detection is your secret weapon against these silent invaders.
Natural Remedies and Pest Control Methods
When it comes to battling pests and diseases, consider nature your ally. Embrace natural remedies and pest control methods that work in harmony with your garden ecosystem.
- Neem Oil: A versatile and natural insecticide, neem oil disrupts the life cycle of pests like aphids. It’s like a protective shield for your plants.
- Ladybugs: Release these charming red-and-black warriors into your garden. Ladybugs feast on aphids and other harmful insects, acting as your garden’s tiny protectors.
- Copper-based Fungicides: For fungal infections, copper-based fungicides provide an effective and natural solution. They’re like the herbal medicine of the plant world.
Example: Battling aphids on my bell pepper plants taught me the importance of regular inspections. Introducing ladybugs into the garden became a natural and efficient solution. It was like inviting friends over for dinner, and they took care of the uninvited guests.
Importance of Early Detection
Early detection is the key to successful pest and disease management. Regularly scout your garden for signs of trouble, and intervene at the first hint of an issue.
- Inspect Leaves: Check both sides of leaves for discoloration, spots, or unusual growth.
- Check Soil: Keep an eye on the soil for signs of pests like grubs or larvae. Sometimes, the problem starts beneath the surface.
- Use Sticky Traps: These traps capture flying insects and provide an early warning system for potential infestations.
Tip: Set aside a specific time each week for a thorough garden inspection. It’s like giving your garden a regular health check-up.
Environmental Stress Factors: Protecting Your Garden Oasis
Your garden is a sanctuary, a place of peace and growth. However, just like any sanctuary, it can face external challenges. Environmental stress factors, ranging from extreme temperatures to harsh winds, can take a toll on your plants, turning their leaves yellow. Let’s explore how to shield your green oasis from these stressors and keep your garden thriving.
Nature’s Challenges
Extreme Temperatures and Sunlight
- Heat Stress: High temperatures can lead to wilting, sunburn, and, you guessed it, yellow leaves. It’s like your plants are telling you they need some shade.
- Cold Stress: On the flip side, chilly temperatures can also cause yellowing. Protect your plants from unexpected frosts and cold snaps.
- Intense Sunlight: Too much of a good thing can be harmful. Sunscald and leaf burn are signs that your plants are getting more sunlight than they can handle.
Wind and Soil Conditions
- Wind Damage: Strong winds can physically damage plants, causing stress and yellowing. It’s like a storm wreaking havoc in your serene garden.
- Soil Issues: Compacted soil restricts root growth and nutrient absorption, leading to yellow leaves. Picture it as your plants struggling to stretch their roots in a cramped space.
Tip: Observing your plants is like listening to their silent requests. If you notice signs of stress, it’s time to intervene and create a more comfortable environment.
Solutions for Protecting Plants from Environmental Stress
- Shade Structures: During heatwaves, provide shade to your plants using structures like shade cloth or row covers. It’s like giving them a cool retreat.
- Mulching: Apply a layer of mulch around your plants to regulate soil temperature and moisture. Mulch is like a cozy blanket for your garden, protecting it from temperature extremes.
- Windbreaks: Install windbreaks, such as fences or shrubs, to shield your plants from strong winds. It’s like creating a protective barrier against the elements.
- Improve Soil Quality: Regularly amend your soil with organic matter to improve its structure. This allows for better water drainage and root development.
Example: One scorching summer, my cucumber leaves started turning yellow due to intense sunlight. Building a simple shade structure made a remarkable difference. It was like creating a mini oasis for my plants, shielding them from the harsh afternoon sun.
Certainly, let’s discuss the section on implementing a holistic approach to address yellow leaves in your vegetable plants:
Implementing a Holistic Approach
Congratulations! You’ve navigated the intricacies of watering, nutrition, pests, and environmental stresses. Now, let’s bring it all together into a holistic approach that ensures your vegetable garden thrives. Think of it as creating a tailored wellness plan for your green companions.
Bringing It All Together
Importance of Addressing Multiple Factors Simultaneously
Your garden is a dynamic ecosystem, and addressing yellow leaves requires a comprehensive strategy. Instead of focusing on a single aspect, consider the collective impact of proper watering, balanced nutrition, pest management, and environmental protection.
- Customized Care Plan: Like individuals, each plant has unique needs. Tailor your care plan based on the specific requirements of the plants in your garden. It’s like providing a personalized regimen for optimal health.
- Regular Monitoring and Adjustments: Pay attention to your garden’s cues. Regularly monitor the soil, inspect leaves, and observe plant behavior. It’s like being in tune with your garden’s rhythm, allowing you to make timely adjustments.
Creating a Customized Care Plan for Your Garden
- Water Wisely: Fine-tune your watering routine based on the moisture needs of different plants. Consider factors like soil type, climate, and the specific requirements of each vegetable.
- Nutrient Management: Continue to conduct periodic soil tests to ensure your plants receive the right balance of nutrients. Adjust your fertilizer application based on the test results.
- Pest Prevention: Integrate natural pest control methods into your gardening routine. Release beneficial insects, use companion planting techniques, and stay vigilant for signs of pests.
- Environmental Protection: Implement strategies to shield your garden from extreme temperatures, wind, and other environmental stressors. This includes using shade structures, windbreaks, and mulching.
Tip: Think of your garden as a living, breathing entity that evolves over time. A holistic approach is like nurturing a relationship – it requires ongoing attention, communication, and adaptation.
Conclusion
As we wrap up this journey to revive your vegetable garden, remember that gardening is a continuous learning process. Every yellow leaf is an opportunity to refine your skills, understand your plants better, and foster a deeper connection with your green companions.
So, how do you plan to implement this holistic approach in your garden? Any challenges or exciting discoveries you’d like to share? Let’s embark on this gardening adventure together, armed with a holistic approach that ensures your vegetable plants not only survive but thrive in your care.